Onyx Maintanence
Keeping your Onyx Hub clean and free of dirt and debris is key in maintaining its high performance capabilities.
1. Use a brush (paint brush or similar) to clean off outer components of hubs.
2. If needed you can use compressed air to blow out tough to reach crevices, being careful not to send a direct blast into bearings.
3. Wipe down the shell with damp rag.
The Drive mechanism is greased for life. It is important if you take apart you hub not to contaminate the internals. The sprag comes greased with a Long-Term ISOFLEX LDS 18 Special A grease and typically will not need to be replaced. Lubricants with additives that decrease the coefficient of friction, i.e. MoS2 or graphite are NOT possible.
With grease lubrication please take care that the clutch is not filled completely with grease: "Less is more" in this case. The clutch should be "greasy" - that's enough.
And generally: It is not allowed to use any lubricant with additives (for example MoS2 or graphite), which decreases the friction coefficient.
If you find it absolutely necessary to re-grease your sprag, please make sure you have everything available before doing so. Once you have your materials, disassemble the hub and remove the sprag. Be careful not to remove the spring around the sprag cage as this will cause the individual sprags to fall out. Clean the sprag using WD-40 and blow out with LOW pressure compressed air. After it is dry, fill the empty space with in sprag with the LDS 18 Special A grease. You want to achieve a 60% fill ratio. Here are the steps!
1. Clean outside of hub and driver before proceeding, this is to keep any debris out of hub during the next steps.
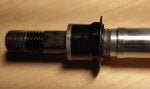
2. Remove Driver side Bolt and widget.
3. Pull and rotate CCW the Driver and remove from shell.
4. Using an ID bearing puller, remove the outer support bearing. You may need to LIGHTLY apply LocTite or similar to the outer portion of the bearing during reassembly.
5. Using a small flat screwdriver, remove the snap-ring from the sprag sleeve.
6. Remove sprag from hub, noting direct of the tails (should be pointing to the left). If you put in backwards you will have a Left hand drive hub!
7. Do NOT remove the spring that is located around the sprag.
8. Place sprag in a container of Mineral Spirits and gently aggitate. Once clean, use WD-40 to rinse it off.
9. Use LOW pressure compressed air to finish off the cleaning, being careful not to blow the sprays out of the cage.
10. Clean inside the hub as best as you can with a lint free towel.
11. Regrease the Sprag using LDS 18 Special A grease only, filling the empty spaces with about 60% grease.
12. Put snap ring back into sleeve, making sure it's fully seated into groove.
13. Install outer bearing, if loose, use a small amount of bearing compound or Loctite.
14. Clean off driver and wipe down with lint free cloth.
15. Insert driver and rotate CCW while pushing in.
16. Install driver side widget and bolt.
Making sure to keep everything clean, reassemble the hub.