Mountain Bike Reviews Forum banner

How to guide: Reshim your ABS+ HSC shim stack

203K views 740 replies 114 participants last post by  half_man_half_scab  
#1 · (Edited)
Seems like there has been a lot of talk on here about Manitous ABS+ damper and how good it is. I have been playing around with the HSC shim stack over the last few months and figured i would make a "how to" guide so others can do the same. It only takes 15-20 minutes and once you get a shim stack set up for your weight, The ABS+ damper is even better!

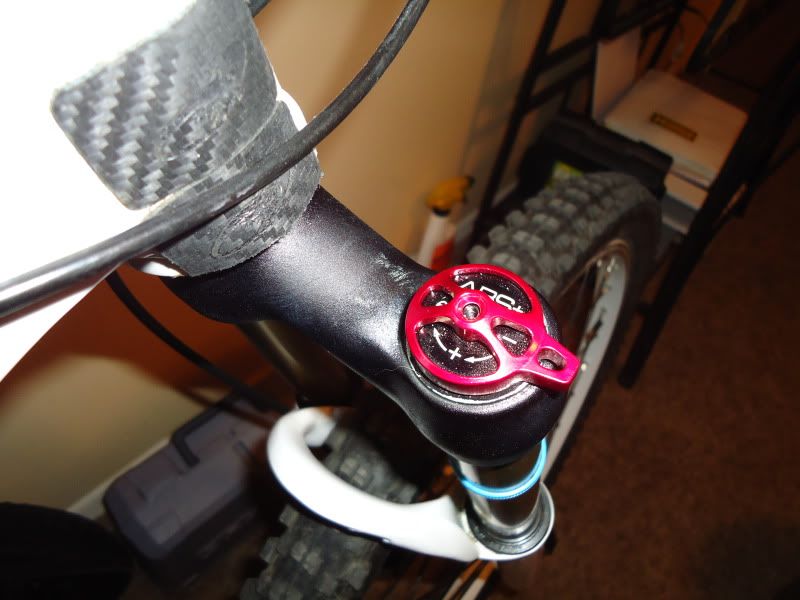
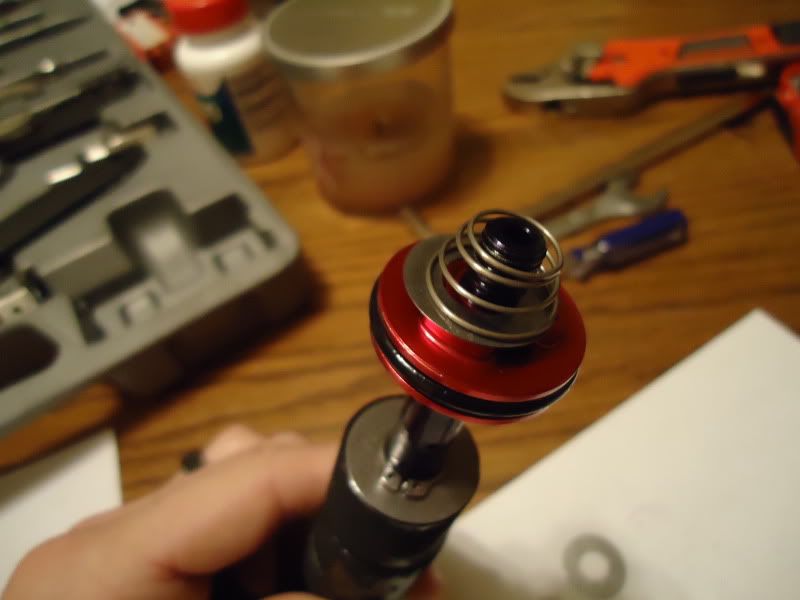
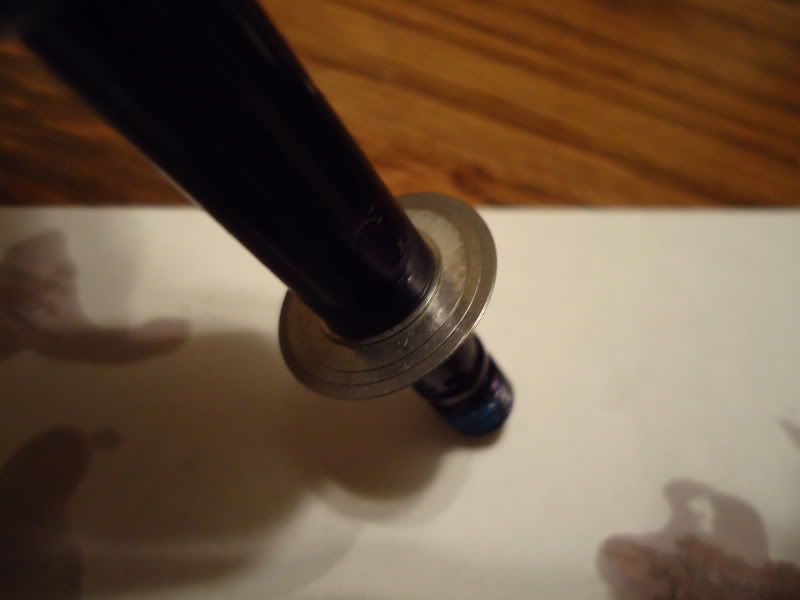
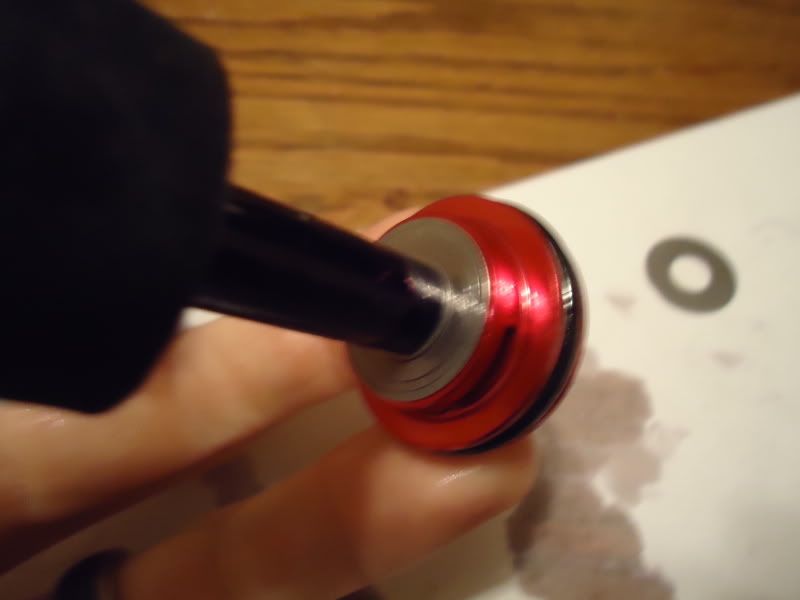
Use a 2.5mm allen wrench to take the top cap off. Take it off carefully!
Image

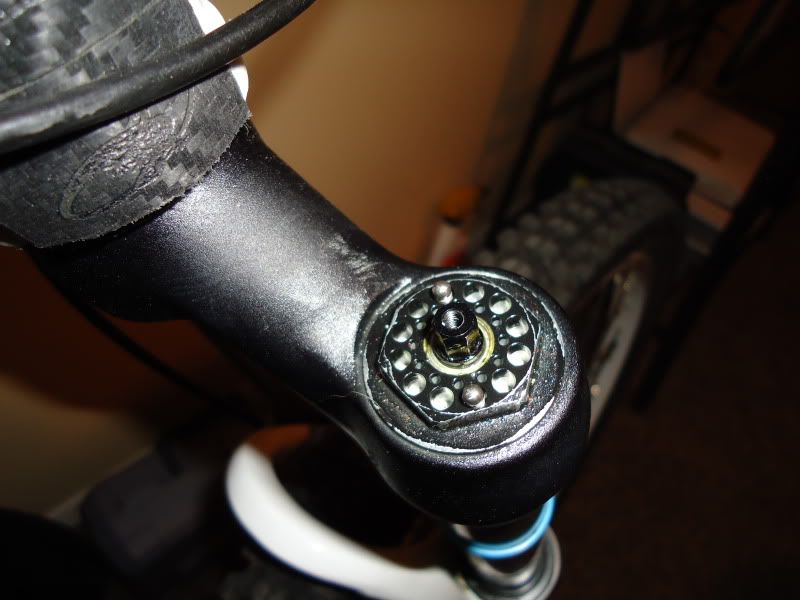
Be careful not to loose the little ball bearings and springs, They are very tiny and easy to loose track of.When you reassemble, it doesnt matter where they springs and bearings go as long as they are across from each other.
Image

Once the top cap is off, unscrew the damper from the leg and pull it out. Pull is out slowly and you wont loose very much oil. Keep a rag near by because you will loose a little no matter what.
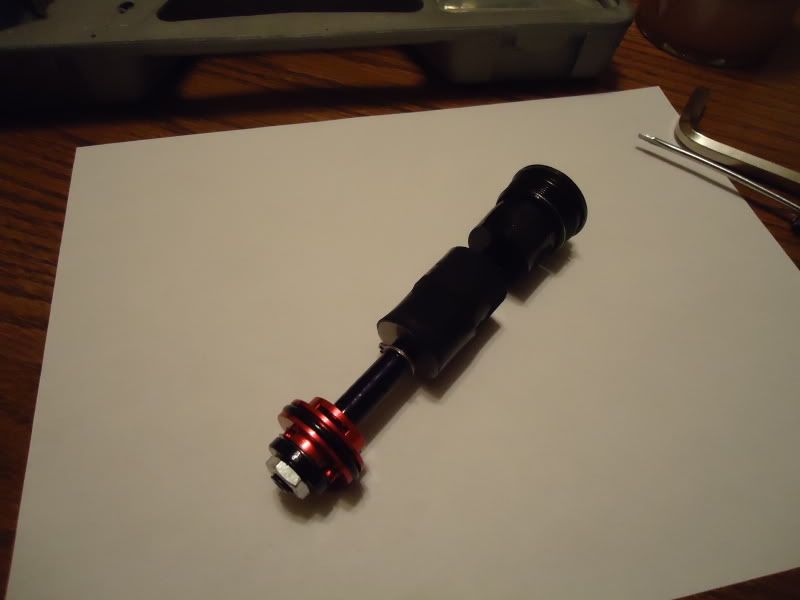
Damper after being pulled out.
Image

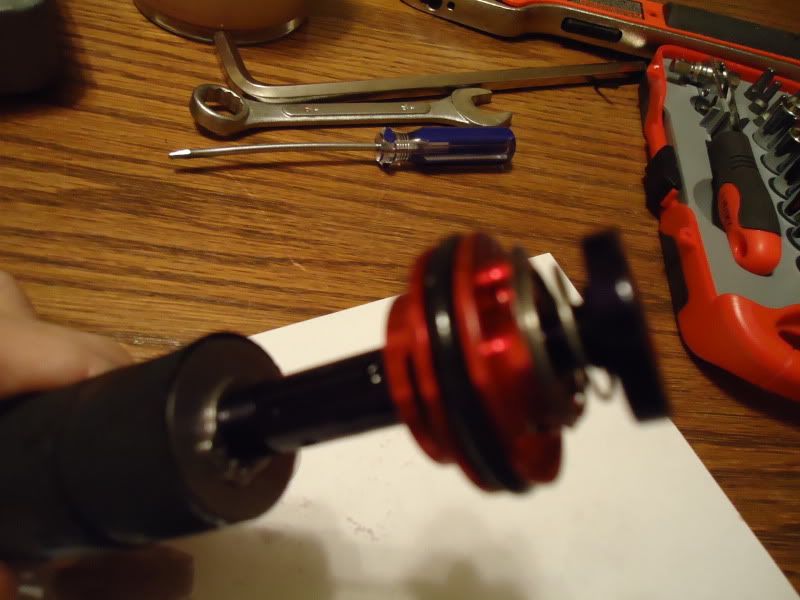
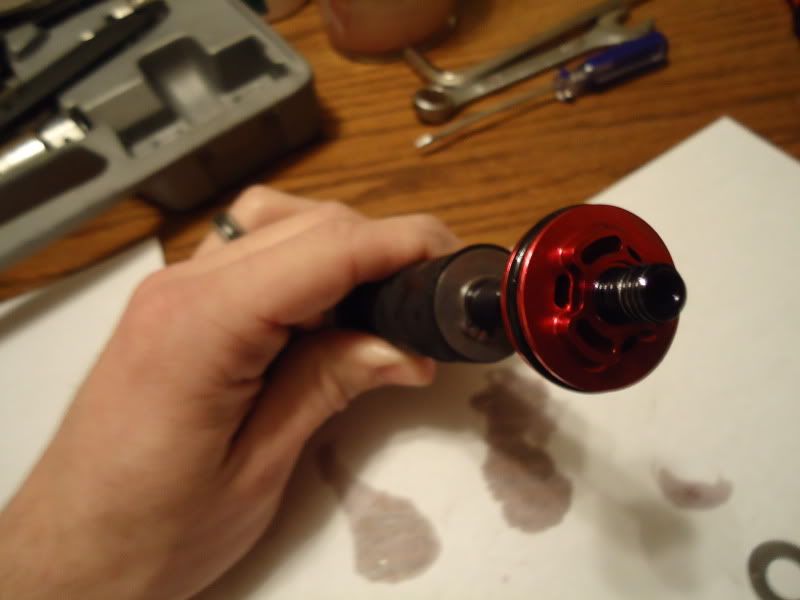
At the very top of the damper, there is a place for a 10mm wrench to hold the damper while you use a 13mm socket to unscrew the nut on the bottom of the piston.

One shim that is used as a check valve and a spring are under the piston. This just allows oil to flow freely back into the leg after the fork is compressed and re-extended. When reassembling, The spring goes back with the wider end toward the piston and the skinnier end toward the nut.
Image

Image

Image

Close up of bottom of piston
Image

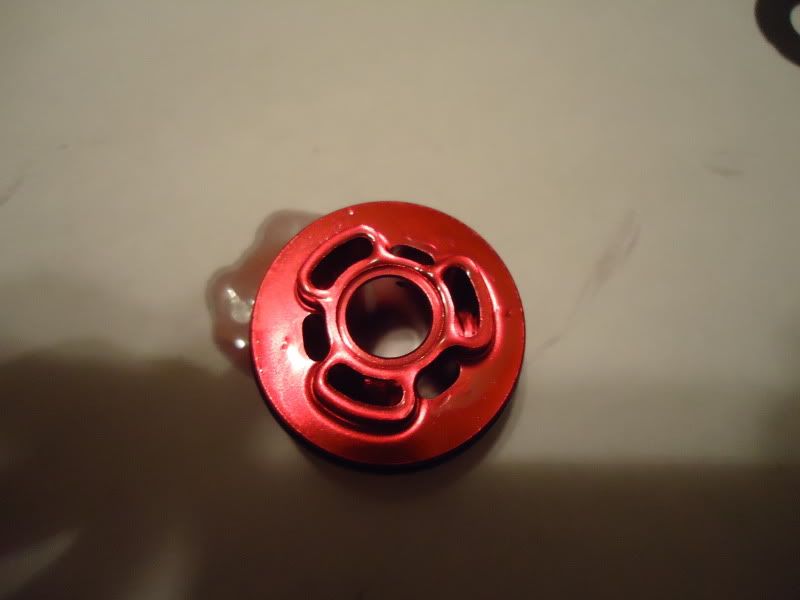
Close up of top of piston
Image

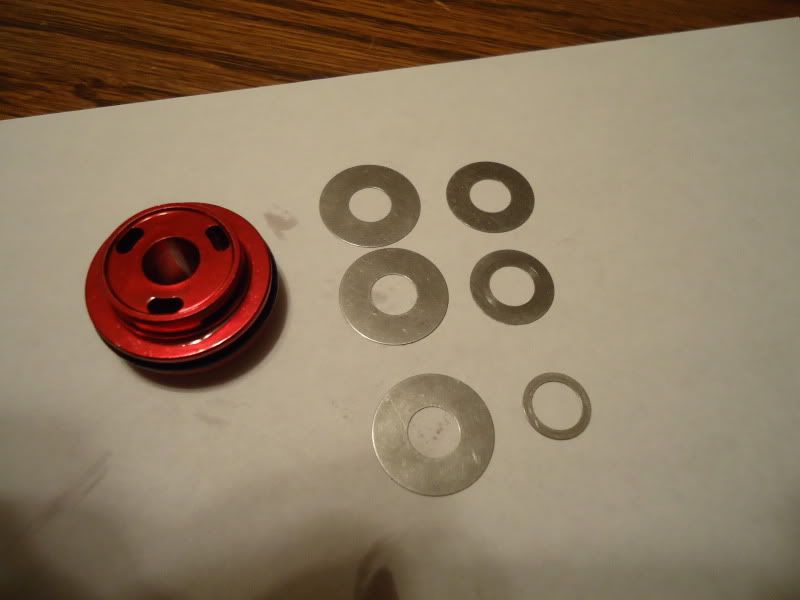
Shim stack installed
Image

Image

My 2010 drake has 6 compression shims stock. 3 the same size, and 3 that get progressively smaller in a pyramid shape. Lighter rider can remove shims to allow the HSC to open with less force, while heavier riders will want to add shims. Endless possibilities for shim configurations, So if you try this, post your weight and shim stack.

Reassemble same way you take it apart. Make sure the LSC is all the way open(counter clockwise) when you put the damper back in the leg. Oil height should be 87mm from the crown when fully assembled. If your careful taking it apart you shouldn't loose a significant amount of oil, but always check to make sure.:thumbsup:

Key points from that this thread has turned up:

1. Thanks to Solitone, we have the Manitou ABS+ tuning guide which includes dyno charts and many different shim stack combinations. Its probably the single best find this thread has produced (thanks Solitone)

This link should work:
https://goo.gl/JaqWO

2. Spring rate needs to be set up correctly. I get PM's and hear of people trying to get their fork to feel right when it is way under/over sprung. Spring rate trumps damping and should always be set up correctly prior to trying different shim stack configurations.

3. A good place to order shims is MX tech.
MX-Tech Suspensions
 
#126 · (Edited)
Some facts about Minute MRD, Absolute+, Mars Air

MRD Absolute+ shims have not been covered in this thread so far.

My Minute MRD, 100 mm travel, 20 mm thru-axle, came with the following shims, starting from shaft:

narrow clamp shim, 9 x 0.2(*) mm x (1)
wide clamp shim, 11 x 0.1 mm x (1)
blow-off shim, 14 x 0.15 mm x (4)
preload reducer shim, 9 x 0.1 mm x (3)

Which is a strange stack: a lot of equal height blof-off shims, reinforced by a wide clamp shim, and preload reduced by as much as 0.3 mm. The fork was impractical to ride with needle fully closed, too much platform and spiking. Running the needle in semi-open positions was a compromise between plushness and bob/dive.

I have installed a 0.2 mm M6 precision washer (technically it's not a dedicated damper shim) to use as the speed shim and only left 1 blow-off washer (now preload reduced by 0.2 mm) and the narrow clamp washer. I hope that this setup resembles tune EK-012611-02 from the Manitou document, which only mentions non-MRD dampers.

I am yet to test this setup in real use -- waiting for the current cold spell to end.

_____________________
(*) This number is taken from memory.

PS
I'm overhauling the fork completely anyway, and have changed the stock coil spring (color code red, which is medium I guess) for spring code 83-3172, which was sold to me as firm, although it has no color markings. It feels firmer by hand indeed. It's also 3.7 mm wire thickness and 87 mm long, as opposed to 3.4 mm and 77 mm respectively on stock spring.

I had to shorten the rubber top out bumper (the one on spring rod) by 10 mm to accomodate the longer spring.

Also, it's a known fact that there is no spring grease/semi-bath oil separating seal in Mars Air forks. Which results in oil penetrating coil spring chamber in use, where it attempts to dissolve the grease (even if you only leave enough grease to cover stahcnion wall from inside -- they put a huge amount of grease in during assembly) and gets thickened in the process. This thickened snot-like mixture has trouble reaching the upper bushing.

What I have done is cut a 4/2 mm heat shrink tube into several 1 cm pieces, piloted them on the spring wire, distributed them around and shrunk them until they are unable to move. I used no grease at all, relying instead on the tube and quality motor oil to protect the stanchion wall.
 
#127 ·
MRD Absolute+ shims have not been covered in this thread so far.

My Minute MRD, 100 mm travel, 20 mm thru-axle, came with the following shims, starting from shaft:

narrow clamp shim, 9 x 0.2(*) mm x (1)
wide clamp shim, 11 x 0.1 mm x (1)
blow-off shim, 14 x 0.15 mm x (4)
preload reducer shim, 9 x 0.1 mm x (3)

Which is a strange stack: a lot of equal height blof-off shims, reinforced by a wide clamp shim, and preload reduced by as much as 0.3 mm. The fork was impractical to ride with needle fully closed, too much platform and spiking. Running the needle in semi-open positions was a compromise between plushness and bob/dive.

I have installed a 0.2 mm M6 precision washer (technically it's not a dedicated damper shim) to use as the speed shim and only left 1 blow-off washer (now preload reduced by 0.2 mm) and the narrow clamp washer. I hope that this setup resembles tune EK-012611-02 from the Manitou document, which only mentions non-MRD dampers.

I am yet to test this setup in real use -- waiting for the current cold spell to end.

_____________________
(*) This number is taken from memory.

PS
I'm overhauling the fork completely anyway, and have changed the stock coil spring (color code red, which is medium I guess) for spring code 83-3172, which was sold to me as firm, although it has no color markings. It feels firmer by hand indeed. It's also 3.7 mm wire thickness and 87 mm long, as opposed to 3.4 mm and 77 mm respectively on stock spring.

I had to shorten the rubber top out bumper (the one on spring rod) by 10 mm to accomodate the longer spring.

Also, it's a known fact that there is no spring grease/semi-bath oil separating seal in Mars Air forks. Which results in oil penetrating coil spring chamber in use, where it attempts to dissolve the grease (even if you only leave enough grease to cover stahcnion wall from inside -- they put a huge amount of grease in during assembly) and gets thickened in the process. This thickened snot-like mixture has trouble reaching the upper bushing.

What I have done is cut a 4/2 mm heat shrink tube into several 1 cm pieces, piloted them on the spring wire, distributed them around and shrunk them until they are unable to move. I used no grease at all, relying instead on the tube and quality motor oil to protect the stanchion wall.
Instead of using the washer, You should get the results you are looking for by removing one(or maybe even two) of the blow off shims. It would allow the stack to blow off easier while still using damper shims. You can also add the shims you remove to top of the stack to give less platform, but keep a little more HSC overall

Let us know how it rides when you get a chance:thumbsup:
 
#130 · (Edited)
Well, here's how that 0.2 mm "speed shim" and 0.15 mm blow-off shim combination feels in room test with needle fully closed: no perceivable blow-off force on low-speed movement, and a suddenly appearing spike feel when I try to compress the fork faster.

Feels like 0.2 mm is way too thick of a speed shim for MRD. At least the improvised type. Since any blow-off force seems to be absent, I'm not even going to try this stack on a real ride.


Next stack to try, starting from shaft:

narrow clamp washer (it's 0.25 mm, I've just measured it)
wide clamp washer
2 x 0.15 mm blow-off shims
1 x 0.1 mm preload reducer
2x 0.1 mm "speed shims", hopefully for 4 times less stiffness than 1 x 0.2 mm (not gonna give up on that idea right away..)


PS
Results are weird. I expected the blow-off force to be about half of what there initially was with 4 blowoff shims and 0.3 mm total preload reduction (which was way too much). But there is still no detectable blow-off force. :confused: And the higher speed spike remains, it just requires me to push the fork faster to trigger it, than it was with 0.2 mm "speed shim".


Anyway.. next stack, starting from shaft:

narrow clamp washer
wide clamp washer
3 x 0.15 mm blow-off shims
2 x 0.1 mm preload reducer
1 x 0.1 mm "speed shim".


PPS
I'm using a very light oil, Stendec Crystal Fork Fluid 2.5W (stock oil that I dumped was definitely heavier). This must be why very low speed compression with needle closed feels like there's an orifice still open. Oil must be having very little trouble flexing whatever "speed shims" that I tried, and (what is mysterious) up to 3 x 0.15 mm blow-off shims, preload reduced by 0.3 mm.


PPPS
I went back to (almost) the first stack I was going to try, but with wide clamp washer added:

narrow clamp washer
wide clamp washer
1 x 0.15 mm blow-off shim
1 x 0.2 mm "speed shim",

and this time changed the oil to a 1:1 mix of Stendec 5W and 10W. Weeeeeeell... it feels better now (with needle sitll fully closed). Much more explainable. What was preceived as absence of blow-off and a sudden spike, is now a platform-like feeling that with reasonable force opens to what feels like heavily damped travel (real riding will tell whether it's too heavy or not).

I guess that the light oil was (in small quantities) bypassing the (defective?) check valve on the front side of piston. It would have had little effect when riding, but on manual room test even the small blow-off force kicking in at higher speeds was perceived as a spike (which it wasn't, it would open if I pressed harder, but in comparison to very low speed free travel it felt like hitting a wall). It's as if the needle was not fully closed, but instead 1-2 clicks from closed.
 
#131 ·
Marzocchi 55r 08'

Hi guys,

Im all the way from the Philippines and I read one of you forum posts. I own a Marzocchi 55r 08 model. It seems to lock out and I only get 2-3 inch travel and even less sometimes. This form is supposed to be 160mm travel.

I read that you can drill into it and make it work again.

Im am not really sure how to do it so I am researching for more info and photos as well.

It'll be a great deal of help if you can send me more specific details.

Thanks much!:thumbsup:

regards,

Nicolas
 
#136 ·
This isn't about reshimming, but I'm hoping some of the manitou experts might be able to help out.

I just serviced my 2011 r7 for the first time, and when I was putting it back together it seems like the threads at the bottom of the leftleg/compressionrod are stripped. The manual says to tighten to 45-55 in-lbs, but I can only get it a little more than fingertight and then it spins and spins. I don't think I stripped it, but the threads are just plastic so it seems like it would be an easy thing to do?

Anyway, I'm assuming that running it like this would be a bad thing and that I should try to track down a replacement compressionrod assembly? Or did I miss something during reassembly that's preventing me from tightening it up? Any advice from the experts?
 
#138 ·
The piston may be spinning in the stanchion. Take the lowers back off and put the bolt back in and tighten it. If the compression rod is spinning with the bolt then the piston is spinning in the stanchion. To fix this, hold the compression rod to stop it from spinning while tightening the bolt. This should clean out the threads and allow you to tighten it when the lowers are attached.
 
#142 ·
Well then, lowers on a R7 (TS Air sprung) fork are best removed and put on with some pressure in air chamber. This preloads the negative spring, which, in turn, presses down on the plastic rod thus preventing it from turning somewhat, together with the force that bolt creates pulling the rod into the bottom of the lower leg. You kind of compress the rod in between the negative spring and the bottom of lower leg.
 
#143 · (Edited)
This is good advice. But I was just thinking about it, and 45in/lbs is not more more then finger tight. Its not a bad idea to pick up a torque wrench if you dont have one already. My current fork( RS Lyrik) says 60in/lbs on the foot bolts and I was shocked at how little torque it was. After you put the bath oil in, Put the bolt in the get everything lined up, then take it out and clean it(bolt and lowers) with rubbing alcohol to get any oil off. Then use some blue locktite to keep it from coming loose. (oil and locktite do not mix very well)

If you dont have or cant get access to a torque wrench, 45/in/lbs will be just a hand tight when holding the short side of an allen wrench.(hope I worded that so it makes sense :lol:)
 
#157 ·
Absolute is a very different damper, it's nothing like Absolute+.

In Absolute, there are no compression shims, just constant sized oil port plugged with blunt-needle-shaped check valve. And it's the preload of that valve which you adjust with the knob, not port size directly.
 
#164 ·
Its down on travel currently (as expected), so not 100% done. I used a tora coil u-turn spring. Just have to change the lower leg cap from a seal head to one for a coil. I used the drake lower cap, and a drake top spring cap. Removed the u-turn cap (its just a c-clip), drilled out the drake cap and installed a short rubber bumper and put the c-clip back on. Slips right in and you're on your way! If i had a pike spring, it would be perfect.

I intended on using all manitou parts for a coil conversion, but they just dont exist. Tried a drake coil pushrod, but its too narrow and falls through the lowers. nixon 145 coil, but its way too long and too fat. The RS u-turn parts end up working better.

Weight be damned, im faster on the coil and its so so much smoother!
 
#165 ·
Its down on travel currently (as expected), so not 100% done. I used a tora coil u-turn spring. Just have to change the lower leg cap from a seal head to one for a coil. I used the drake lower cap, and a drake top spring cap. Removed the u-turn cap (its just a c-clip), drilled out the drake cap and installed a short rubber bumper and put the c-clip back on. Slips right in and you're on your way! If i had a pike spring, it would be perfect.

I intended on using all manitou parts for a coil conversion, but they just dont exist. Tried a drake coil pushrod, but its too narrow and falls through the lowers. nixon 145 coil, but its way too long and too fat. The RS u-turn parts end up working better.

Weight be damned, im faster on the coil and its so so much smoother!
That is awesome. Post some pics when your done. I love franken forks. A straight coil Minute is very appealing.