Mountain Bike Reviews Forum banner

How to guide: Reshim your ABS+ HSC shim stack

203K views 740 replies 114 participants last post by  half_man_half_scab  
#1 · (Edited)
Seems like there has been a lot of talk on here about Manitous ABS+ damper and how good it is. I have been playing around with the HSC shim stack over the last few months and figured i would make a "how to" guide so others can do the same. It only takes 15-20 minutes and once you get a shim stack set up for your weight, The ABS+ damper is even better!

Use a 2.5mm allen wrench to take the top cap off. Take it off carefully!
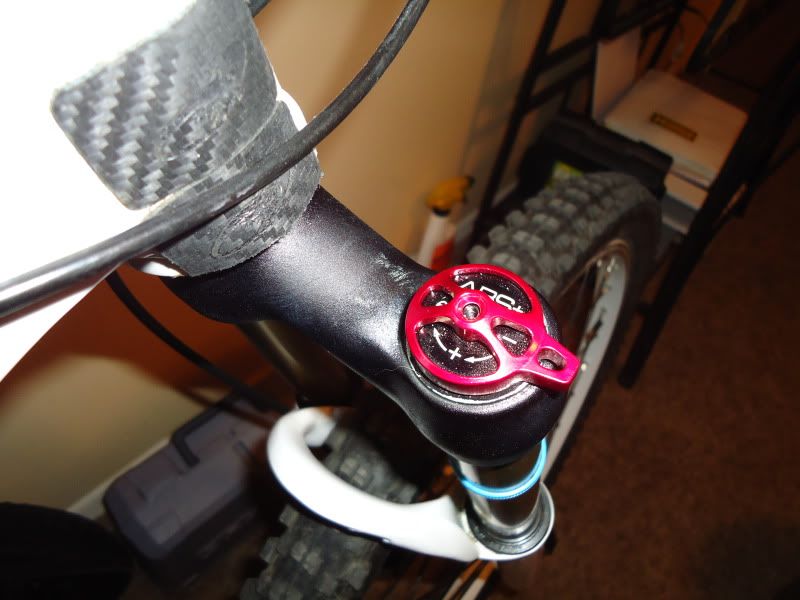
Image

Be careful not to loose the little ball bearings and springs, They are very tiny and easy to loose track of.When you reassemble, it doesnt matter where they springs and bearings go as long as they are across from each other.
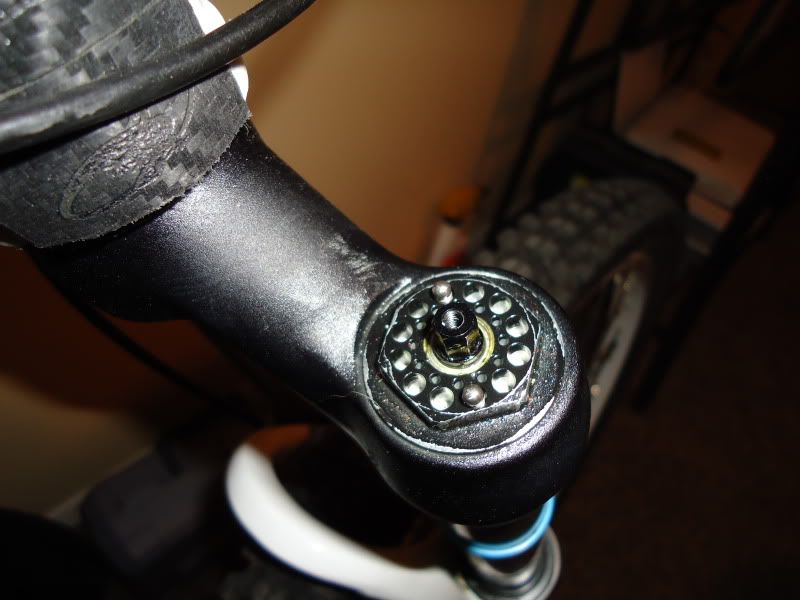
Image

Once the top cap is off, unscrew the damper from the leg and pull it out. Pull is out slowly and you wont loose very much oil. Keep a rag near by because you will loose a little no matter what.
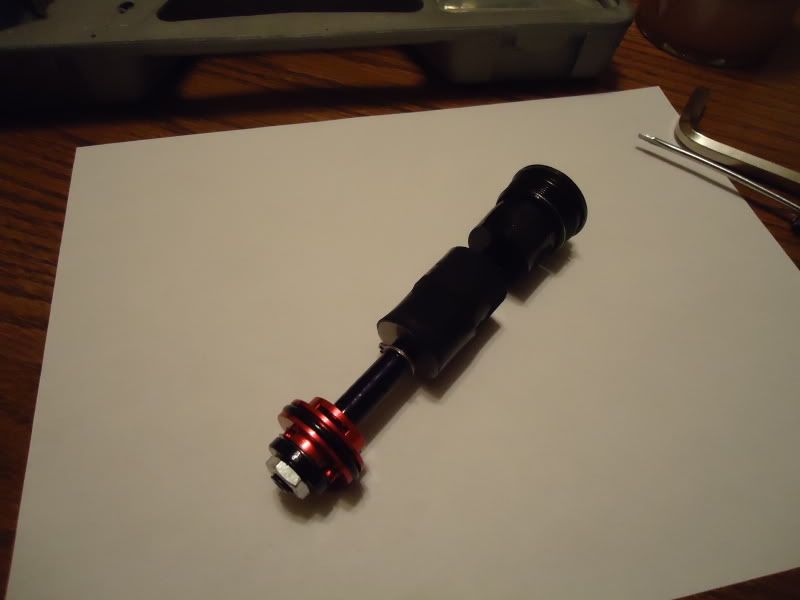
Damper after being pulled out.
Image

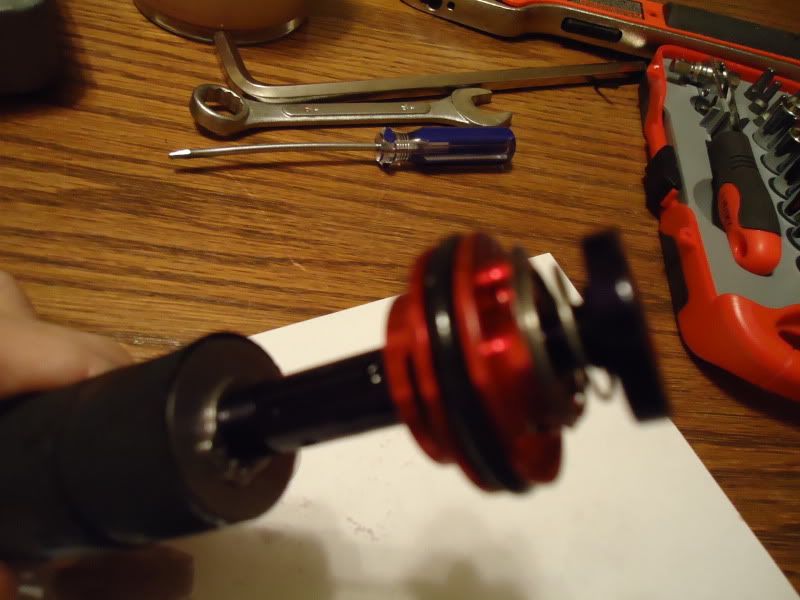
At the very top of the damper, there is a place for a 10mm wrench to hold the damper while you use a 13mm socket to unscrew the nut on the bottom of the piston.

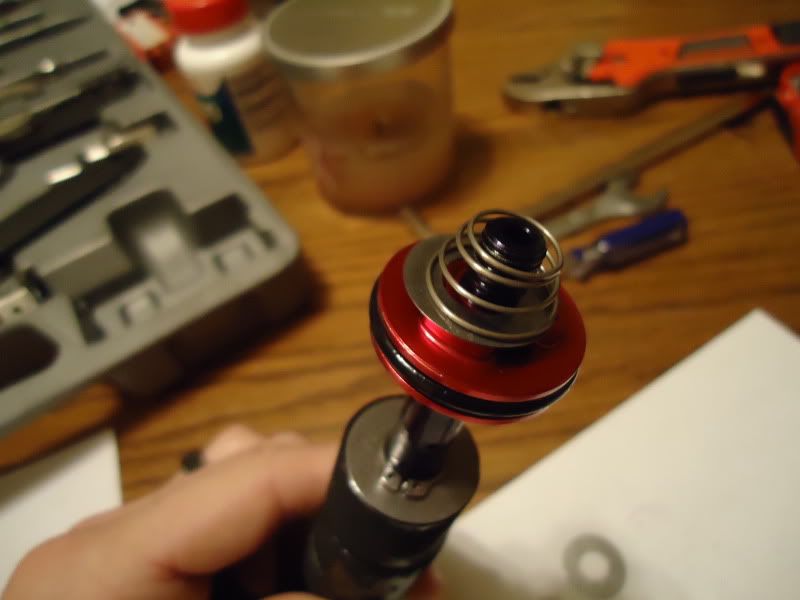
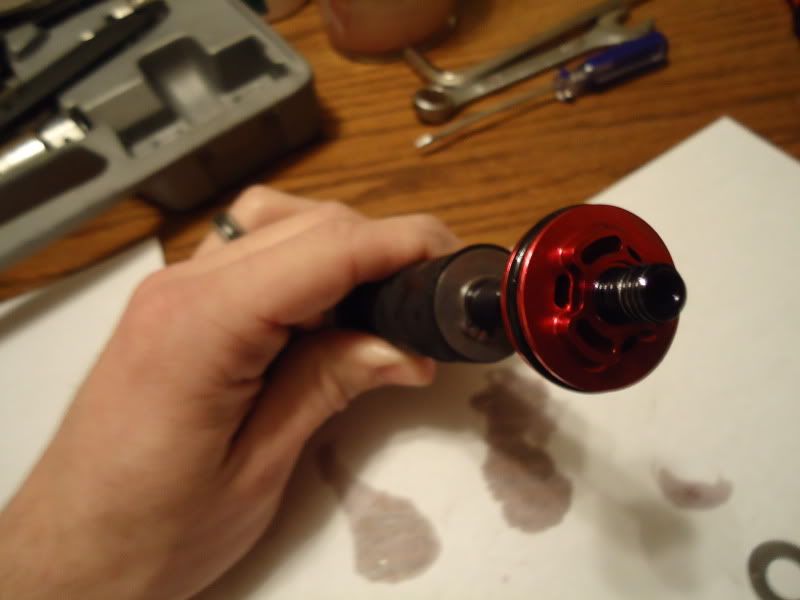
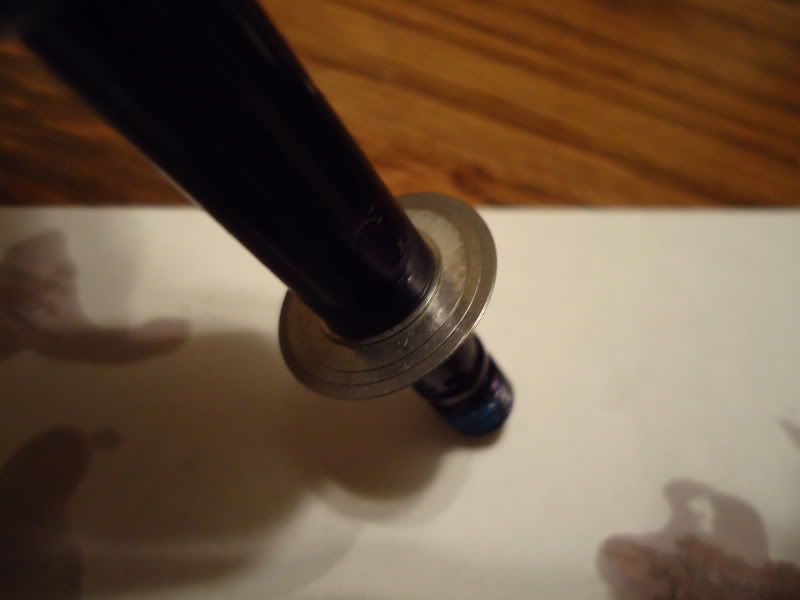
One shim that is used as a check valve and a spring are under the piston. This just allows oil to flow freely back into the leg after the fork is compressed and re-extended. When reassembling, The spring goes back with the wider end toward the piston and the skinnier end toward the nut.
Image

Image

Image

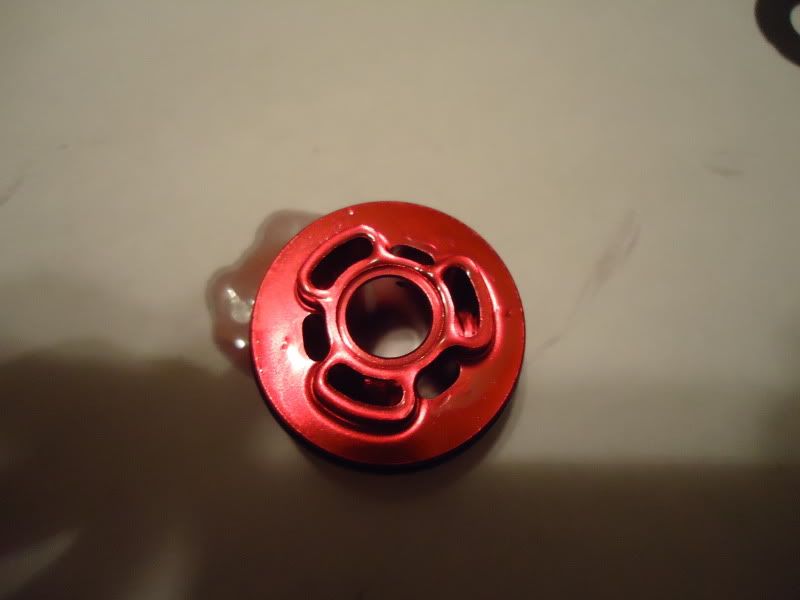
Close up of bottom of piston
Image

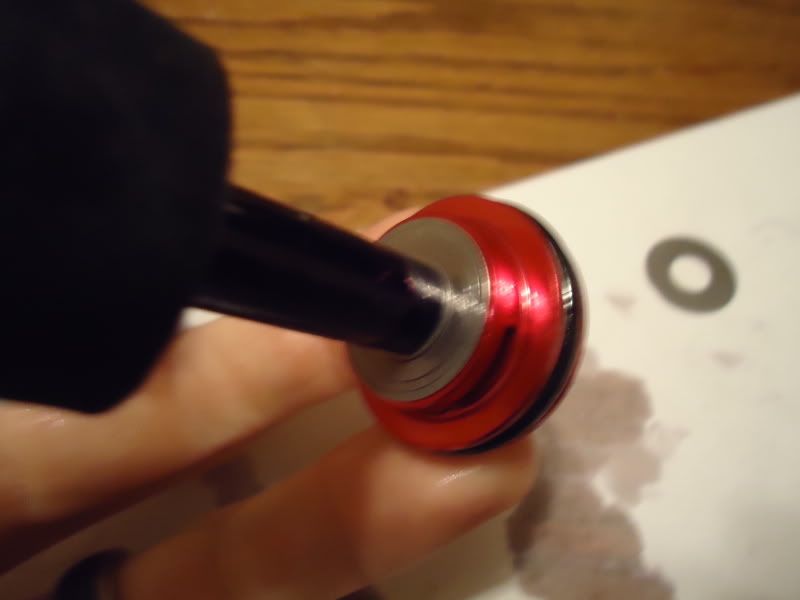
Close up of top of piston
Image

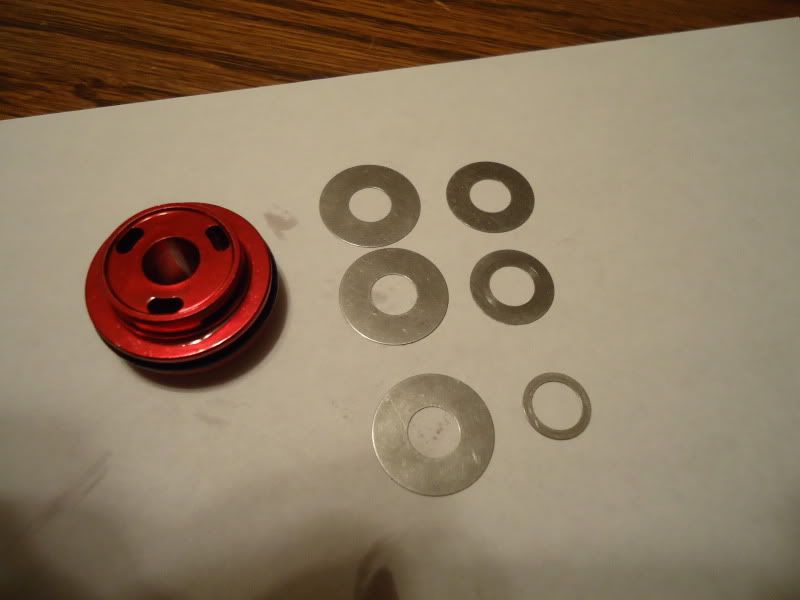
Shim stack installed
Image

Image

My 2010 drake has 6 compression shims stock. 3 the same size, and 3 that get progressively smaller in a pyramid shape. Lighter rider can remove shims to allow the HSC to open with less force, while heavier riders will want to add shims. Endless possibilities for shim configurations, So if you try this, post your weight and shim stack.

Reassemble same way you take it apart. Make sure the LSC is all the way open(counter clockwise) when you put the damper back in the leg. Oil height should be 87mm from the crown when fully assembled. If your careful taking it apart you shouldn't loose a significant amount of oil, but always check to make sure.:thumbsup:

Key points from that this thread has turned up:

1. Thanks to Solitone, we have the Manitou ABS+ tuning guide which includes dyno charts and many different shim stack combinations. Its probably the single best find this thread has produced (thanks Solitone)

This link should work:
https://goo.gl/JaqWO

2. Spring rate needs to be set up correctly. I get PM's and hear of people trying to get their fork to feel right when it is way under/over sprung. Spring rate trumps damping and should always be set up correctly prior to trying different shim stack configurations.

3. A good place to order shims is MX tech.
MX-Tech Suspensions
 
#497 ·
The platform in XC stack is way too strong. For a singlespeed I'd leave just enough platform to prevent bob while standing (leaving 1-2 thinnest platform shims and playing with their preload). The fork wouldn't be plush though, but as soon as you really need it, it would kick in.
 
#504 ·
I recently changed my Marvel shim stack from XC to teh Trail version. Pretty sure I removed both platform shims and I added a speed shim (18 OD x 0.2 thick). I weigh about 72kh without gear, and it made a significant difference. I have always run teh fork fully open. But now I get MUCHbetter small bump sensitivity. I thought I might blow through the travel muich faster but that hasnt been a problem. The suspension on big hits has remained unchanged. I highly recomend the changes. Also, I havent noticed any brake dive or pedal bobn. Ive got the 120mm version.
 
#506 ·
On full open not much is going to change because the shim stack has little effect. I can't believe anyone would ride these full open as dive and Bob is impossible to deal with. But if your exceptionally light weight or used to a fork with a very bad damper, then it's possible I guess. I'm not a great rider or anything, but brake dive and Bob drove me nuts out of the box on anything more open than 5 clicks open. Felt like I was riding a bike with a Walmart fork that had rebound dampening at least.

Actually sounds more like you have your air pressure too high on the air spring. Marvel expert and pro versions have a negative spring which gives awesome small bump compliance to nce the fork has a few rides on it and you have your air pressure set correctly.


Sent from my XT1565 using Tapatalk
 
#508 ·
Ya I didn't see you ask that, I could have explained. And all the info is on manitou's website. The comp your not going to get the small bump compliance of better forks due to the air spring. TS air is a simple and basic air spring system. The expert and pro use ISO air which has a negative spring to give the complainace.

Expert vs pro I see no gain besides for the weight weenies. The damper is reduced to cartridge instead of full leg bath. Less fluid in the damper = lower weight. Though I do not know if expert is available all thru axle variants. I just know it comes in 15mm.

Comp version is limited and messing with the damper is going to do little (is it even abs+?). It will improve after some use. Reducing platform shims would help at speed if you want to close the damper more (so it's actually doing something).

Another thing that may help (we can do it with ISO air, not sure on TS air) is making the air spring more progressive by adding oil to the air spring (very small amounts) and running your pressure lower.

Sag is only a STARTING POINT. You adjust more or less depends on what you need. There is alot that can be tuned on manitou's forks, takes time and research to learn and understand how to adjust each thing.

Sent from my XT1565 using Tapatalk
 
#509 ·
Iso air and ts air are nearly identical spring systems. Both are positive air springs with negative coil springs. The only difference is that there is a soft, elastomer like bumper between the piston and push rod that helps the first few mm of travel be free of seal drag. One is not much different from the other performance wise.

Also, adding oil on the piston doesn't really work. The oil makes it past the quad ring very quickly. Manitou is no longer specing oil on the pistons in new forks, opting for a good coating of suspension grease (slicoleum/slick honey) instead. It just works better.

Definitely move away from the stock xc stack. It's far to stiff for normal riding. Trail stacks or even linear work much better, allowing you to dial in a proper lsc setting without a harsh feel
 
#511 ·
It just works better. It caused issues on the mattoc because the oil fairly quickly made its way to the negative chamber. The TS/iso air system don't show issues as quickly because of the negative coil, but after a few rides the piston is dry and performance suffers.

Prep m is decent, but fairly thin when temperatures get warm. That's why the switch to slicoleum. It tends to stay in place longer when being used as a primary lubricant.
 
#512 ·
That's one thing i haven't seen yet as I opened my system several times during tuning. Being a big guy, they tune well but takes a little more time. Each change I would ride a few times.

Never had a dry air piston but between the last 2 changes I did notice 95% of the extra oil I had put in the air chamber was gone. Thought maybe I had forgot to put it back in (which I'm insanely meticulous so was surprised). But this would explain things, it just slowly worked it's way past into the bottom of the fork. Shocking oil makes it through but air doesnt (not at a noticeable rate anyway)

Sent from my XT1565 using Tapatalk
 
#513 ·
That's one thing i haven't seen yet as I opened my system several times during tuning. Being a big guy, they tune well but takes a little more time. Each change I would ride a few times.

Never had a dry air piston but between the last 2 changes I did notice 95% of the extra oil I had put in the air chamber was gone. Thought maybe I had forgot to put it back in (which I'm insanely meticulous so was surprised). But this would explain things, it just slowly worked it's way past into the bottom of the fork. Shocking oil makes it through but air doesnt (not at a noticeable rate anyway)

Sent from my XT1565 using Tapatalk
The two rides I stated is for the few ml called for. More would last longer.

What happens is the oil clings to the walls and the seals slide past some of it rather than wiping it clean. On the rebound stroke, it pushes just a little bit down to the bottom, lost into the negative spring. Multiply that by thousands of stokes and it all disappears. You can solve it by having a lip on the quad ring to wipe the oil clean, but that adds friction.
 
#514 ·
Ya I didn't even think about all that. I put extra in for changing progression but noticed on the last service (after a season) it was all gone, not dry but very little in there and after bike Sat for a bit, started seeing a bit of stiction. Never thought about the internal seal design.

Which I'm fine with that, I'll stuff some prep m in there on this service I'm about to do (well just change lower oil, clean/grease wipers, etc). Don't see a point right now with almost full tube of prep m to buy something different as I'm on a limited budget. Added a fat bike to my garage and it needs love too (bought used) after riding it hard and putting it away wet all season.

Thanks for the info there, I didn't know about that update. But too my Marvel's are going on season 3 technically with first 2 being short. Bought forks in August yr 1, last yr I was down for several months do to elbow injury followed by surgery to fix it. I still service it each year regardless. But since everything is like new, saw no need to check into anything. This year it'll probably see it a couple times.

Sent from my XT1565 using Tapatalk
 
#516 ·
I recently got a 100mm 29er Marvel comp and have been slowly reading through and digesting all the available ABS+ tuning info including the Manitou shim stack tuning guide.

Looking a bit further trying to research the effects of shim stack tuning, it pretty quickly became apparent that shock tuners from the motorcycle world have developed a deep understanding and knowledge of the the complex dynamics of shock tuning that would be potentially beneficial for a better understanding of out ABS+ manitous. One of the sources I came across was the commercial spreadsheet calculation program Shim ReStackor, Finally software to tune a shim stack
From the trial demo, the shimrestacker program looks to be very detailed but with a steep introductory learning curve and much of the preset options and documentation is geared more directly for motorcross shocks. I would be curious if anyone has ever successfully configured shimrestacker to analyze manitou fork ABS+ shim tuning or if there are any similar (but perhaps less complex) shim stack calculation programs available?

Short of trying to program an entire physics simulation calculator, it occurred to me that it might not be too difficult to input all the manitou factory ABS+ tuning guide info into a spreadsheet in order to help sort out some of the tuning options. The combine HSC + LSC dyno curves would be complicated to model but it should not be to difficult to calcualte the overall spring rate, pre-load tension and platform levels for some of the more basic tuning curves. Has anyone tried something similar ?
 
#517 ·
I'm not sure how one can model the ABS+ special piston with lip in the Shim Restackor. Actually tuning of the ABS+ is so fast and the number of reasonable combinations is not big - so the easiest (and most fun) way is just start experimenting.

First question is - do you need any preload at all? I recommend to check out linear stacks first. I ride cross country and use light linear stack with low speed needle almost closed - it has very good small bump sensitivity and good midstroke. I like to spin (no out of saddle sprints) and this stack fits me very well.
 
#530 ·
. I ride cross country and use light linear stack with low speed needle almost closed - it has very good small bump sensitivity and good midstroke. I like to spin (no out of saddle sprints) and this stack fits me very well.
Could you describe the linear stack you are running. Your riding style sounds a lot like mine. Can you describe it starting from the clamp shim (what size ) and then going to the piston?

Thanks. I've been on Clamp | 15x0.15 | 17x0.2 |Piston and it has been ok.
 
#518 ·
OK Mullen, decided to do a full service. Trying something different too. First I did as advised, prep m in the air chamber.

Went linear stack (2 speed and 1 13mm to stiffen things up on are hard hit), 120mm with around 30% sag. Hopefully smooth things out while I keep my lsc half closed to keep dive/Bob where I like it.

@gray: advise, I did the sheets and all that, spent hours burning them into my brain. Outcome is I have no idea where the print offs are, could care less. Simple things to know.

Platform shim creates a "blow off" type effect. The biggest diameter ones. Unless you want it to have a platform for climbs, just leave them out. As I did now, too harsh for my liking as my climbs always have roots and crap.

Speed shims: these are your linear damping. More/thicker the stronger the effect. Useful info is that it takes (numbers are for reference, not actual thicknesses) 3 of a .01 thickness to equal 1 .02 thickness for damping effect.

13mm shims create a "second stage" to the linear. On small bumps the speed shims deal with it, when you have a bigger hit, the speed shims want to open all the way, but the 13mm shim (s) stiffen the speed shims after they open to a certain point. Increasing damping effect when you have a big hit to reduce bottom out.

May not be 100% correct way of explaining it but that's how I have it in my head. Shims are easy to swap around so why not give yourself more excuses to ride. Testing out fork tuning. Fancy graphs and curves give you a reference to understand how each shim size effects properties. Beyond that they are totally useless as outside temp, variations in rider weight and so on will change those curves.

LAB TESTS ARE ONLY FOR A REFERENCE AS A STARTING POINT, THEY ARE NOT REAL WORLD PERFORMANCE[emoji14]

Sent from my XT1565 using Tapatalk
 
#519 ·
Useful info is that it takes (numbers are for reference, not actual thicknesses) 3 of a .01 thickness to equal 1 .02 thickness for damping effect.
I'm pretty sure that it takes about 8 .1 shims to have equal damping effect of 1 .2 shim. There is cubic relationship between thickness and stiffness of shims.

From Shim Restackor page (http://www.shimrestackor.com/Code/Sample_Applications/Demo_3Clk/3clk-softer.htm):

"Here, you could attempt to apply the typical shim stack rules of thumb: stack stiffness varies with the diameter squared and the thickness cubed"
 
#522 ·
Dude for the love of God, I don't have my sheets around to look at SO I WAS USING RANDOM NUMBERS, get over it. Ratio is 3:1,8:1,or 100:1 I don't care, was a simple point I was trying to make to explain regarding just use one thicker shim instead stacking. Basically don't over think it cause it's a waste of time.

What part of I don't use my sheets (and I don't use more than a couple of the same shim diameters stacked) did you miss???

Sent from my XT1565 using Tapatalk
 
#523 ·
Dude for the love of God, I don't have my sheets around to look at SO I WAS USING RANDOM NUMBERS, get over it. Ratio is 3:1,8:1,or 100:1 I don't care, was a simple point I was trying to make to explain regarding just use one thicker shim instead stacking. Basically don't over think it cause it's a waste of time.
Ok, I didn't realize that all the number weres random. I thought that only thicknesses were selected arbitrarily.

What part of I don't use my sheets (and I don't use more than a couple of the same shim diameters stacked) did you miss???
I just tried to correct what seemed to be an error.
 
#524 ·
No I just tried to give an idea, my print outs probably got thrown out last summer and have a new phone now so didn't have the PDF either.

But for reference cause this thread is insanely long now, here's a good place to get a variety of shims. It's where I get mine vs buying the entire manitou kit.

http://www.racingsuspensionproducts.com/shim/shim.html

Sent from my XT1565 using Tapatalk
 
#525 ·
Tigris, Arnea- Thanks for the info and feedback.
I do a lot of riding on climbs so I think I want to keep a bit of platform in order to be able to eliminate pedal-bobbing while climbing. The stock XC tune CV-11411-03 was definitely stiffer than I liked but I am pretty happy with XC tune CV-11411-04 achieved by adding a single 10mm OD x 0.25 thick preload reducer shim below the two stock 19mm platform shims. The preload reduction cuts the platform and force curve roughly in half from the original CV-11411-03 tune. I also like being able to keep the LSC adjuster closed or just cracked open a click or two in order to reduce brake dive compared to a tune where I would need to open the LSC further to keep it somewhat plush.

I did a bunch more reading and came to the realization that it would be fairly difficult project to write a simple spreadsheet that would somewhat accurately predict all the possible shim stacks. From the documentation, it does appear that the restackor program can be configured to handle the complex fluid dynamics and shim pre-load that are produced by the 0.6mm lip on top of the ABS+ port. Purchasing the restackor program to do the modeling would be a bargain compared to the time involved if someone actually needed that level of info.

As far as I got was to calculate the spring constants for the standard individual ABS+ shims. Even just doing this requires some fairly complex calculations. Individual shim stiffness is influenced variously by both the outside diameter and the inside (hole) diameter, by the height of the shim and by the ratio of the height to the OD.
As you pointed out, increasing the shim thickness has a cubed effect on the individual shim thickness (thicker shims are stiff). What is not quite as intuitive is that for a fixed shim ID (8mm) and thickness, a reduction of the OD produces a stiffer individual shim. Rather than tackle the shim stiffness calculations myself, I found an engineering spreadsheet designed for calculating "Bellville spring" (dished disk springs). Bellville spring stiffness behave much differently if they are manufactured with excessive concave/convex dishing, but you can use the same equation to calculate stiffness of a flat shim by just setting the overall height of the dished spring a tiny bit more than the shim material thickness. The spreadsheet generates an error if you put the Bellville spring height exactly equal to the shim material, but it works fine if you enter a overall height of 0.21mm for a 0.20mm thickness shim. Spreadsheet I used was downloaded from; Excel Belleville Spring Calculator

I ran all the standard ABS+ shims and came up with the following spring rate constants (K) for shims all of 8mm ID;

OD (mm)_H(mm) K(N/mm)
19mm____0.2____ 27.6
19mm____0.15____11.6
19mm____0.1_____3.4
17.5mm__0.2_____33.5
17.5mm__0.15____14.2
17.5mm__0.1______4.2
17mm____0.2_____36.0
17mm____0.15____15.2
17mm____0.1______4.5
15mm____0.2_____49.8
15mm____0.15____21.0
15mm____0.1______6.2
13mm____0.2_____75.6
13mm____0.15____31.9
13mm____0.1 _____9.4

Comparison graph of the results looks like;


Admittedly none of this does much to directly predict the combine complex behavior of shims stacked together which are of different OD. A common MX shim stack configuration is to have a large OD shim on the bottom and stack against the valve port and gradually tapering springs stacked on top. The resulting tapered shim stack should have a combine stiffness that is a bit less than the combine individual shim stiffness because the large shim hangs out from beneath the smaller, stiffer shim above and so is only partially stiffened by those above. Still, just knowing the relative stiffness of individual shims should be helpful for selecting shims for an experimental stack..

Unfortunately, I dont see an obvious direct relationship between the calculated shim spring rates and the observed blow-off force needed to overcome the platform level of the XC tune stacks.
 
#526 ·
The platform shims have preload. That's what creates the platform. If you noticed when you were making changes, there is a raised lip that the platform shims rest on. When you tighten the assembly the shims are compressed into a dish shape. This removes the normal spring rate. Instead it requires a certain level of pressure before they "pop" open.

Sent from my XT1565 using Tapatalk
 
#527 ·
As I understand spring physics, you should be able to multiply the spring rate constant (K) by the amount of pre-load deflection to determine the force needed to lift the shim off of the lip.
For a 19mmx0.2t shim pre-loaded 0.6 mm, the calculated force to lift the shim is thus 27.6 N/mm x 0.6mm = 16.6 N.

If you look at the graphs for pre-loaded tunes CV-11411-03 (using two 19mm shims) and CV-11411-07 (using three19mm shims) and divide the blow-off platform force by the # of shims, this tells you that each of the pre-loaded 19mm shims contributes an average of 254 N of force to the platform so a bit over 1 order of magnitude difference from my calculated springs. You would also need to include in the calculation that the 11mmx 0.5T clamp shim above the pre-load shim would stiffen the 19mm shims to function more like a 19mm OD shim with a 11mm ID (instead of actual 8mm ID), the 11mm clamp should make the platform shims around 20% stiffer.

All I can think is that perhaps somehow I miscalculated the spring-rate constants at 1/10 the actual rate, in which case the calculated force 165N x 120% = 200N would be a bit closer to the observed chart blow-off force of 254N per shim.
 
#528 ·
Dude, your making me think to much :p. I understand all that but my "mental capacity" prefers led lighting systems[emoji14]
My guess would be like I said, your over thinking it so probably made a very simple mathematical mistake is all. Recheck your calculations but keep it simple, one piece at a time. Especially if I understand you correctly and your off by a factor of 10. Simply forgot a 0 or accidently put a decimal in the wrong spot. IT HAPPENS, don't dwell on it.

And there is alot of other factors in how a fork will perform. So if your doing all this just to "analyze and understand" then awesome. You have more patience than me (but I do the same with LED bike lights and flashlights). If your doing this to determine best shim set up, your beating your head on a wall. Ambient temperature, air chamber pressure, riding position, bike geometry, and the list goes on will screw up what you think your accomplishing. Too many variables.

I'm hoping for the former (cuz you can) instead of the latter. Be nice to have another "analyst" dealing with manitou forks. Couple good guys here already, but except Mullen, their not around much. And I personally prefer the "try-ride-try something else-ride again" technique. DONT THINK, DRINK (well ride then drink :p)

Sent from my XT1565 using Tapatalk